![]() ASP
.NET MVC 3 - Usando validação por imagens - CAPTCHA
ASP
.NET MVC 3 - Usando validação por imagens - CAPTCHA
Eu ja tratei deste assunto em dois artigos:
O primeiro é um abordagem ASP .NET e o segundo uma abordagem ASP. Se quiser ver o projeto em funcionamento acesse aqui: Usando CAPTCHA - Macoratti.net
Dessa forma não vou perder tempo definindo o que é CAPTCHA mas vou mostrar como implementar este recurso em uma aplicação ASP .NET MVC.
Para implementar o recurso CAPTCHA temos que gerar uma imagem que um humano possa interpretar e um computador não.
Se você procurar no Google vai encontrar centenas de referências e códigos prontos para fazer esta implementação e em nosso exemplo eu vou usar código puro sem recorrer a componentes de terceiros. O código usado foi obtido e adaptado de um exemplo adaptado na internet.
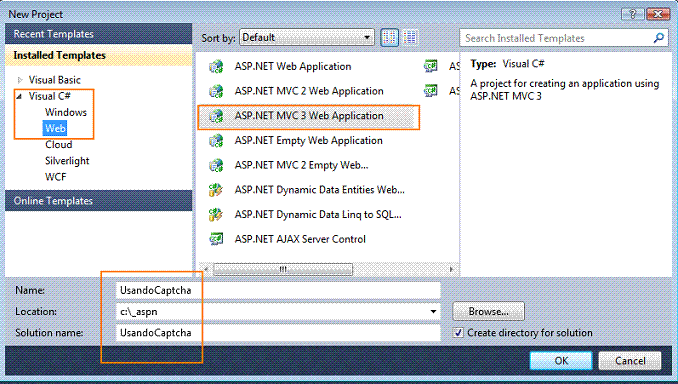
Abra então o Visual Web Developer 2010 Express Edition e crie um novo projeto do tipo ASP .NET MVC 3 Web Application com o nome UsandoCaptcha;
 |
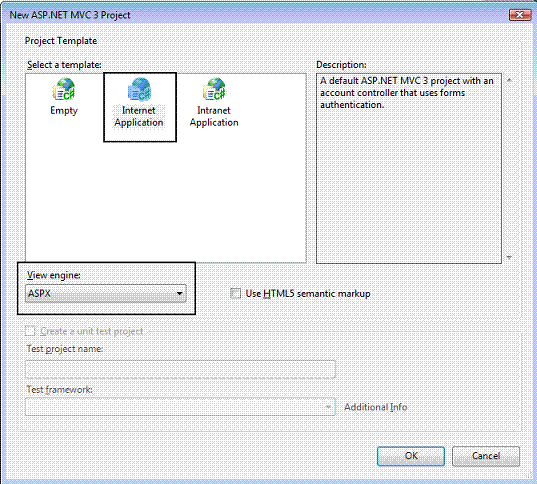
A seguir selecione o template Internet Application e o View Engine ASPX e clique OK;
 |
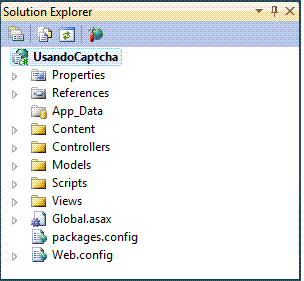
Dessa forma é criada uma solução com toda a estrutura pronta para a nossa aplicação MVC:
 |
Agora vamos iniciar o nosso trabalho...
1- Definindo o Model
No model vamos definir duas classes:
Clique com o botão direito do mouse sobre a pasta Models e selecione Add -> Class informando o nome CaptchaResult e a seguir defina o seguinte código nesta classe:
| using System.Web; using System.Web.Mvc; using System.Drawing.Imaging; namespace UsandoCaptcha.Models { public class CaptchaResult : ActionResult { public string _captchaText; public CaptchaResult(string captchaText) { _captchaText = captchaText; } public override void ExecuteResult(ControllerContext context) { Captcha c = new Captcha(); c.Text = _captchaText; c.Width = 200; c.Height = 50; c.FamilyName = ""; HttpContextBase cb = context.HttpContext; cb.Response.Clear(); cb.Response.ContentType = "image/jpeg"; c.Image.Save(cb.Response.OutputStream, ImageFormat.Jpeg); c.Dispose(); } } } |
Na classe CaptchaResult
temos : Um construtor
onde estamos passando o texto usado para gerar O método ExecuteResult
que sobrecarregado onde criamos uma instância da classe |
Vamos então criar a classe Captcha:
Clique com o botão direito do mouse sobre a pasta Models e selecione Add -> Class informando o nome Captcha e a seguir defina o seguinte código nesta classe:
using System;
using System.Drawing;
using System.Drawing.Drawing2D;
using System.Drawing.Imaging;

namespace UsandoCaptcha.Models
{
    public class Captcha
    {
        private string text;
        private int width;
        private int height;
        private string familyName;
        private Bitmap image;
        private static Random random = new Random();

        public string FamilyName
        {
            get { return familyName; }
            set { familyName = value; }
        }
        public string Text
        {
            get { return this.text; }
            set { text = value; }
        }
        public Bitmap Image
        {
            get
            {
                if (!string.IsNullOrEmpty(text) && height > 0 && width > 0)
                    GenerateImage();
                return this.image;
            }
        }
        public int Width
        {
            get { return this.width; }
            set { width = value; }
        }
        public int Height
        {
            get { return this.height; }
            set { height = value; }
        }

        public Captcha()
        {}

        ~Captcha()
        {
            Dispose(false);
        }

        public void Dispose()
        {
            GC.SuppressFinalize(this);
            this.Dispose(true);
        }

        protected virtual void Dispose(bool disposing)
        {
            if (disposing)
                this.image.Dispose();
        }

        private void SetDimensions(int width, int height)
        {
            // Check the width and height.
            if (width <= 0)
                throw new ArgumentOutOfRangeException("width", width, "Argument out of range, must be greater than zero.");
            if (height <= 0)
                throw new ArgumentOutOfRangeException("height", height, "Argument out of range, must be greater than zero.");
            this.width = width;
            this.height = height;
        }

        private void SetFamilyName(string familyName)
        {
            try
            {
                Font font = new Font(this.familyName, 16F);
                this.familyName = familyName;
                font.Dispose();
            }
            catch
            {
                this.familyName = System.Drawing.FontFamily.GenericSerif.Name;
            }
        }

        public void GenerateImage()
        {
            // Create a new 32-bit bitmap image.
            Bitmap bitmap = new Bitmap(this.width, this.height, PixelFormat.Format32bppArgb);

            // Create a graphics object for drawing.
            Graphics g = Graphics.FromImage(bitmap);
            g.SmoothingMode = SmoothingMode.AntiAlias;
            Rectangle rect = new Rectangle(0, 0, this.width, this.height);

            // Fill in the background.
            HatchBrush hatchBrush = new HatchBrush(HatchStyle.SmallConfetti, Color.FromArgb(114, 172, 236), Color.FromArgb(161, 214, 255));
            g.FillRectangle(hatchBrush, rect);

            //-----------------------------------------
            // Set up the text font.
            SizeF size;
            float fontSize = this.height + 4;
            Font font;
            // Adjust the font size until the text fits within the image.
            do
            {
                fontSize--;
                font = new Font(this.familyName, fontSize, FontStyle.Bold);
                size = g.MeasureString(this.text, font);
            } while (size.Width > this.width);

            // Set up the text format.
            StringFormat format = new StringFormat();
            format.Alignment = StringAlignment.Center;
            format.LineAlignment = StringAlignment.Center;

            // Create a path using the text and warp it randomly.
            GraphicsPath path = new GraphicsPath();
            path.AddString(this.text, font.FontFamily, (int)font.Style, font.Size, rect, format);
            float v = 4F;
            PointF[] points =
                {
                    new PointF(random.Next(this.width) / v, random.Next(this.height) / v),
                    new PointF(this.width - random.Next(this.width) / v, random.Next(this.height) / v),
                    new PointF(random.Next(this.width) / v, this.height - random.Next(this.height) / v),
                    new PointF(this.width - random.Next(this.width) / v, this.height - random.Next(this.height) / v)
                };
            Matrix matrix = new Matrix();
            matrix.Translate(0F, 0F);
            path.Warp(points, rect, matrix, WarpMode.Perspective, 0F);

            // Draw the text.
            hatchBrush = new HatchBrush(HatchStyle.SmallConfetti, ColorTranslator.FromHtml("#000000"), ColorTranslator.FromHtml("#000000"));
            g.FillPath(hatchBrush, path);

            //// Add some random noise.
            int m = Math.Max(this.width, this.height);
            for (int i = 0; i < (int)(this.width * this.height / 30F); i++)
            {
                int x = random.Next(this.width);
                int y = random.Next(this.height);
                int w = random.Next(m / 50);
                int h = random.Next(m / 50);
                g.FillEllipse(hatchBrush, x, y, w, h);
            }

            // Clean up.
            font.Dispose();
            hatchBrush.Dispose();
            g.Dispose();

            // Set the image.
            this.image = bitmap;
        }

        public static string GenerateRandomCode()
        {
            string s = "";
            for (int i = 0; i < 6; i++)
                s = String.Concat(s, random.Next(10).ToString());
            return s;
        }
    }
}
|
Este código foi copiado e adaptado a partir de um exemplo encontrado na web dessa forma não vou comentar o mesmo. Ele trata da geração da imagem e se você desejar pode substituí-lo por outro desde que o ajuste para MVC seja feito.
1- Definindo o Controller
Vamos agora definir o controle e para isso vou aproveitar o arquivo HomeController da pasta Controllers gerado quando da criação do projeto.
Vamos abrir o arquivo HomeController e incluir dois métodos novos conforme o código abaixo:
| using System.Web; using System.Web.Mvc; using UsandoCaptcha.Models; namespace UsandoCaptcha.Controllers { public class HomeController : Controller { public ActionResult Index() { ViewBag.Message = "Macoratti .net - Quase tudo para Visual Basic, C# e ASP .NET"; return View(); } public CaptchaResult GetCaptcha() { string captchaText = Captcha.GenerateRandomCode(); HttpContext.Session.Add("captcha", captchaText); return new CaptchaResult(captchaText); } [HttpPost] public ActionResult Index(string captcha) { if (captcha == HttpContext.Session["captcha"].ToString()) ViewData["Message"] = "O desafio CAPTCHA foi vencido com sucesso!"; else ViewData["Message"] = "O desafio CAPTCHA falhou - tente novamente!"; return View(); } public ActionResult About() { return View(); } } } |
O método getCaptcha onde fazemos uma chamada para classe Captcha para gerar o texto do desafio. Para isso usamos o método GeneratRandomCode que gera um número aleatório, coloca na sessão para ser usado para podermos depois fazer a comparação com o que foi informado pelo usuário.
Vamos definir método Index do tipo ActionResult que espera uma string como captcha; vamos especificar o atributo [HttpPost] para indicar que esta Action vai lidar com mensagens de formulário do tipo Post e não do tipo Get. Este método será responsável por realizar a comparação do desafio e retornar o resultado.
Definindo o View
Finalmente vamos criar o nosso view e para isso a pagina Index.aspx criada na pasta Views->Home;
Abra o arquivo Index.aspx e digite o código abaixo:
<%@ Page Language="C#" MasterPageFile="~/Views/Shared/Site.Master" Inherits="System.Web.Mvc.ViewPage" %>

<asp:Content ID="Content1" ContentPlaceHolderID="TitleContent" runat="server">
    Home Page
</asp:Content>

<asp:Content ID="Content2" ContentPlaceHolderID="MainContent" runat="server">
    <h3><%: ViewBag.Message %></h3>
    <p>
        Para aprender mais sobre ASP.NET MVC visite <a href="http://asp.net/mvc" title="ASP.NET MVC Website">http://asp.net/mvc</a>.<br />
        E não esqueça também de visitar <a href="http://macoratti.net" title="Macoratti .net - Quase tudo para ASP .NET">http://macoratti.net</a>.
    </p>
    <p>
    <% using (Html.BeginForm("index", "home"))
     { %>
       <p><img src="/home/getcaptcha" /></p>
       <p>Para vencer o desafio CAPTCHA - informe o número da figura acima:</p>
       <p><%=Html.TextBox("captcha")%></p>
       <p><input type="submit" value="Submeter" /></p>
     <% }
    %>
    </p>
</asp:Content>
|
Nesta página primeiro incluímos um formulário e a seguir incluímos uma imagem que carrega o método GetCaptcha; Também incluímos uma mensagem solicitando ao usuário para informar o texto do desafio em um controle TextBox e submter a sua resposta usando um controle Button;
HTML Helpers:

A lista a seguir mostra alguns dos auxiliares HTML disponíveis do ASP .NET MVC:

    ActionLink— Links para um método Action;
    BeginForm* — Marca o início de um formulário e dos links para o método Action que processa o formulário.
    CheckBox* — Apresenta uma caixa de seleção.
    DropDownList* — Apresenta uma lista drop-down.
    Hidden— Incorpora informações no formulário que não é renderizado para o usuário veja.
    ListBox— Apresenta uma caixa de listagem.
    Password— Apresenta uma caixa de texto para digitar uma senha.
    RadioButton* — Apresenta um botão de rádio.
    TextArea— Processa uma área de texto (caixa de texto de várias linhas).
    TextBox* — Apresenta uma caixa de texto.
|
Executando o projeto iremos obter primeiro a apresentação do desafio com o número Captcha na figura 1.0, e a exibição da página caso o usuário não consiga vencer o desafio (figura 2.0):
 |
 |
Figura 1.0 |
Figura 2.0 |
E assim concluímos a implementação da nossa validação por imagens usando CAPTCHA em uma aplicação ASP .NET MVC 3. Foi mais fácil do que você pensava não é mesmo ???
Pegue o
projeto completo aqui:
![]() UsandoCaptcha.zip
UsandoCaptcha.zip
João 1:6
Houve um homem enviado de Deus, cujo nome era João.Referências: